

Welcome back, crypto enthusiasts! In this step-by-step guide, I’ll walk you through the complete process of transferring your USDT or any other cryptocurrency from a centralized exchange to a decentralized wallet. For this tutorial, we’ll use Binance as our centralized exchange and MetaMask as our decentralized wallet.
The reason I’m using Binance is simple — it’s one of the most popular and beginner-friendly exchanges in the crypto world. Many new traders start their crypto journey on Binance because of its easy interface, strong security, and wide range of supported coins. On the other hand, MetaMask is one of the most trusted decentralized wallets. It’s widely used across the crypto community for storing tokens, interacting with decentralized applications (DApps), and managing assets directly on the blockchain.
In this guide, I’ll explain each step clearly, so even if you’re completely new to crypto transfers, you can follow along without any confusion. The same method can also be applied to other exchanges like Bybit, OKX, or KuCoin, with only minor differences in interface or menu names. By the end of this tutorial, you’ll understand how to safely move your crypto from an exchange to your own wallet — giving you full control over your digital assets.
What is Meta Mask?
MetaMask is a decentralized crypto wallet that allows users to store, send, and receive cryptocurrencies like Ethereum (ETH), USDT (ERC-20), and other tokens built on blockchain networks such as Ethereum, BNB Smart Chain, and Polygon. It works as both a browser extension and a mobile app, making it easy to connect with decentralized applications (DApps), NFT marketplaces, and DeFi platforms.
For example, if you’re using a DeFi site like Uniswap, you can connect your MetaMask wallet to swap tokens directly without using any centralized exchange. In simple terms, MetaMask gives you full control of your crypto assets by storing your private keys securely on your device.
Transfer USDT Binance to Meta Mask
Transferring your crypto to MetaMask is a very simple process — and it’s not limited to just USDT. You can use the same steps to transfer other cryptocurrencies as well. Just follow the step-by-step guide below carefully to complete your transfer safely.
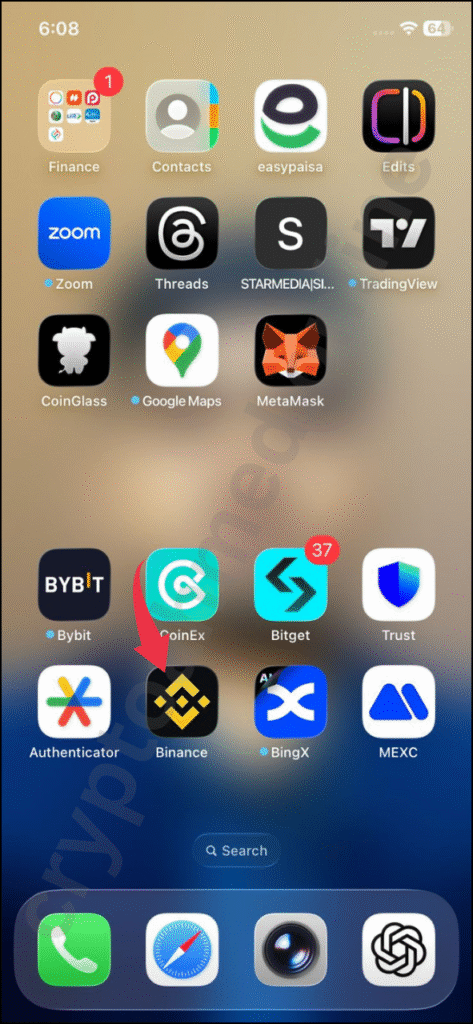
Step 1: Open Binance
First, open the Binance app on your phone. Before you start, make sure the app is updated to the latest version, as older versions may not include some important features. If you’re using an outdated version, go to the Google Play Store or Apple App Store, update the app, and then open it.
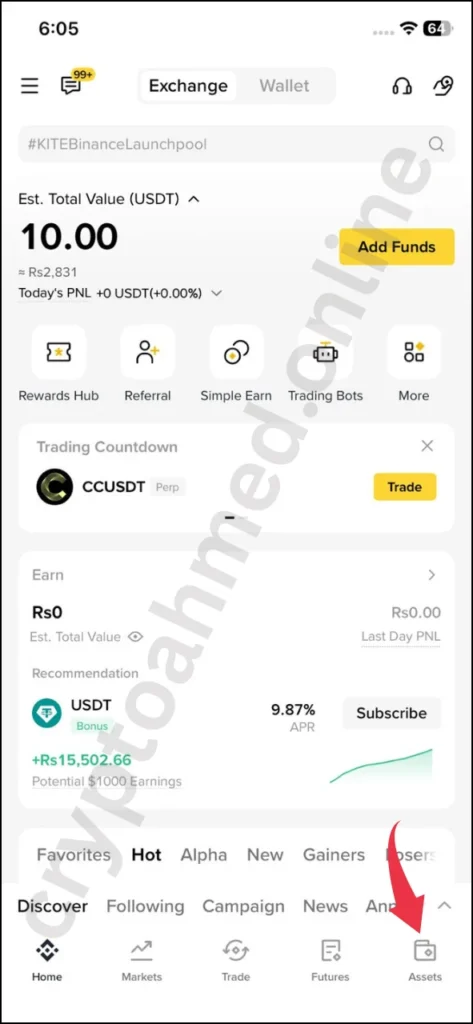
Step 2: Go to Assets
Go to the Assets section, located at the bottom right corner of the Binance app. Make sure you have at least 10 USDT available in your Binance account. If you don’t have enough balance, you can either deposit funds or buy USDT using P2P trading before proceeding.
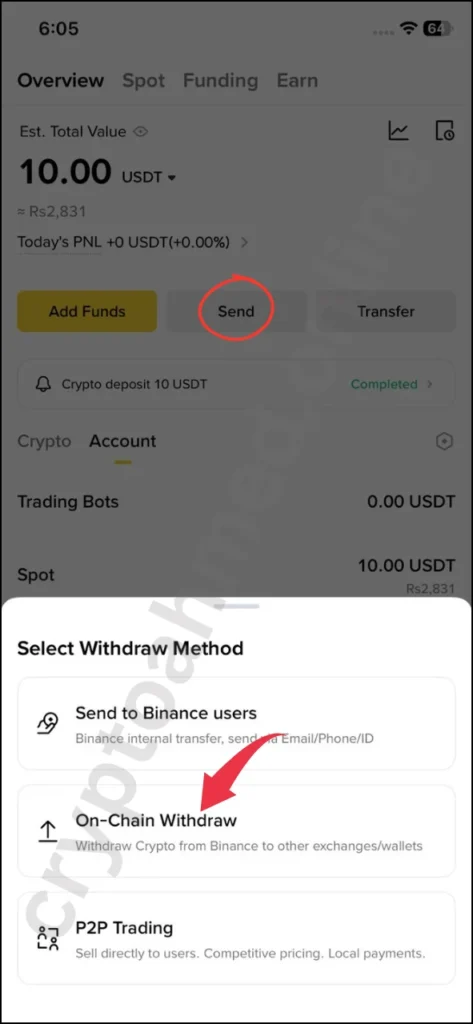
Step 3: Click Send On Chain
Click on the Send button, then select the On-Chain Withdrawal option to transfer your USDT through the blockchain network.
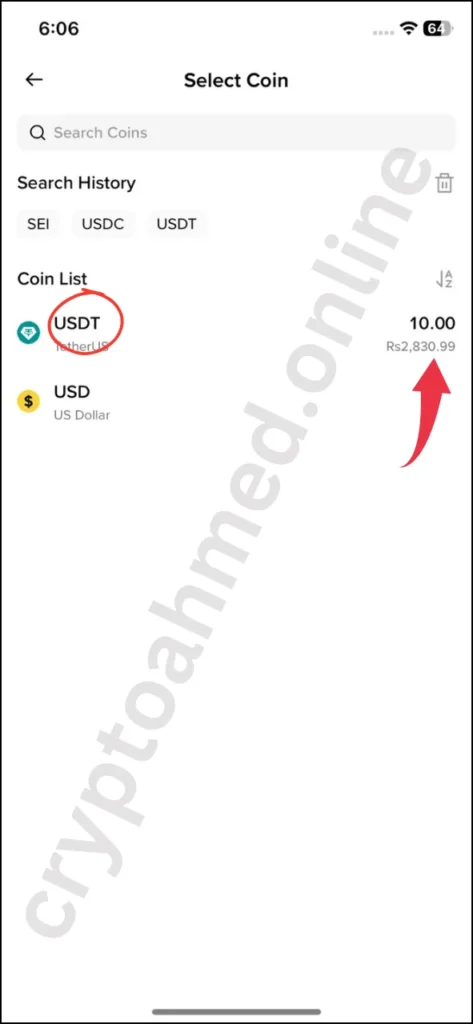
Step 4: Select Coin
Next, select the coin you want to send to your MetaMask wallet. In my case, I only have USDT available in my Binance account, so I’ll select USDT for this transfer.
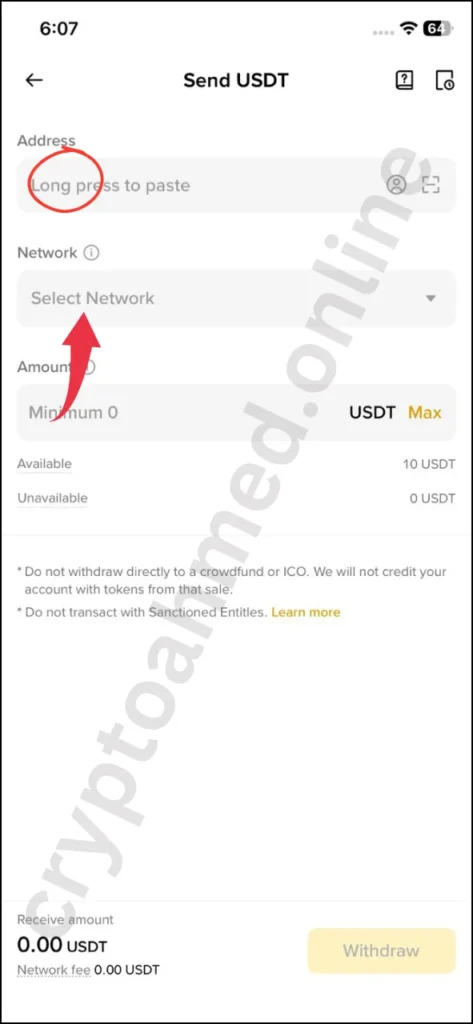
Step 5: Enter Receiver Details
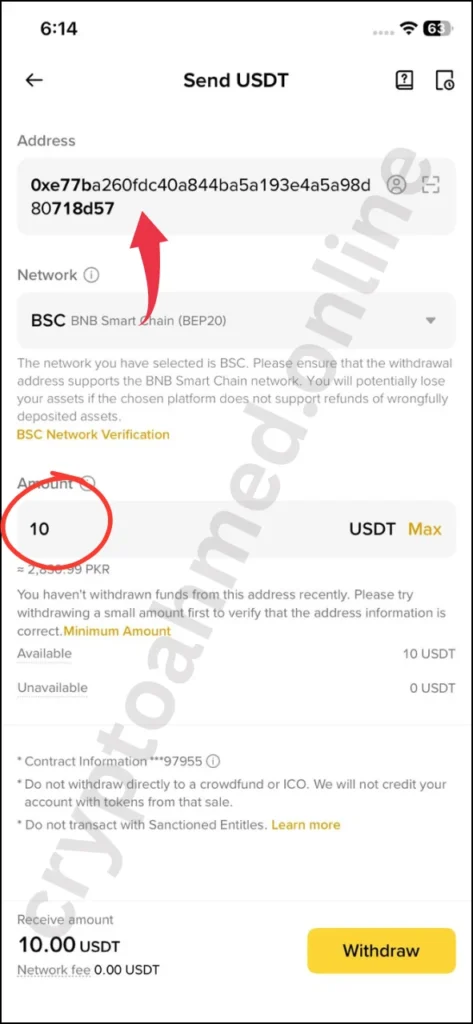
In the final step, enter your receiver’s details, including the wallet address, network, and the amount of coins you want to send. Make sure all the information is entered accurately, and double-check everything before confirming the transaction.
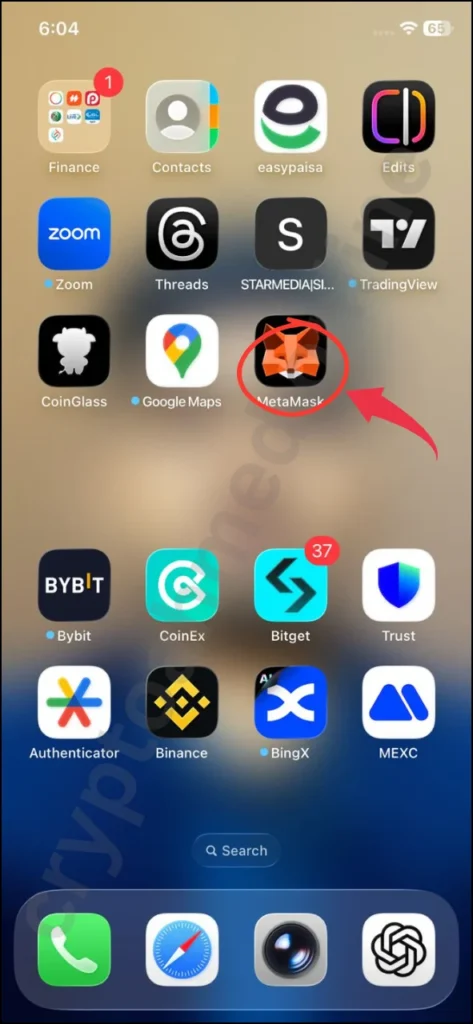
Step 6: Open Meta Mask
Open the MetaMask app to get the correct wallet address for receiving USDT. Before doing so, make sure your MetaMask app is updated to the latest version to avoid any errors or missing features.
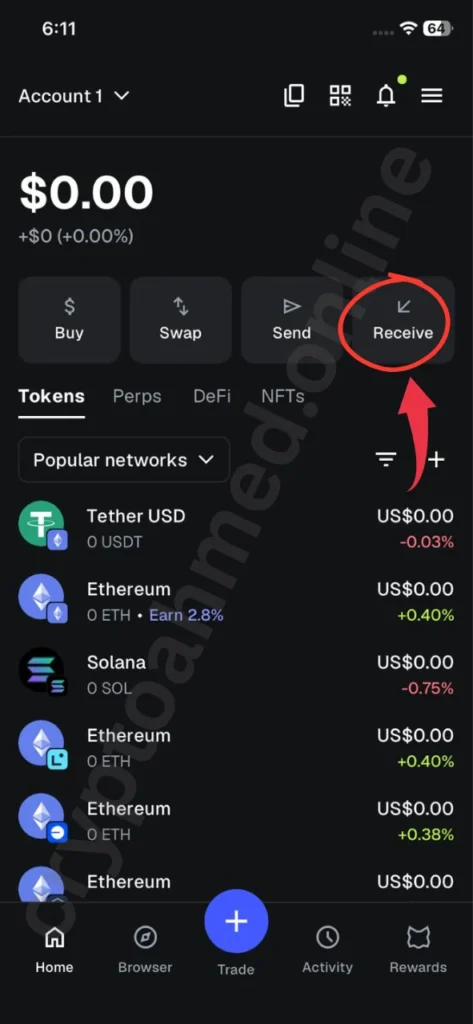
Step 7: Click on Receive
In MetaMask, you’ll see several options at the top — Buy, Swap, Send, and Receive. Tap on the Receive option to get your wallet address for incoming transactions.
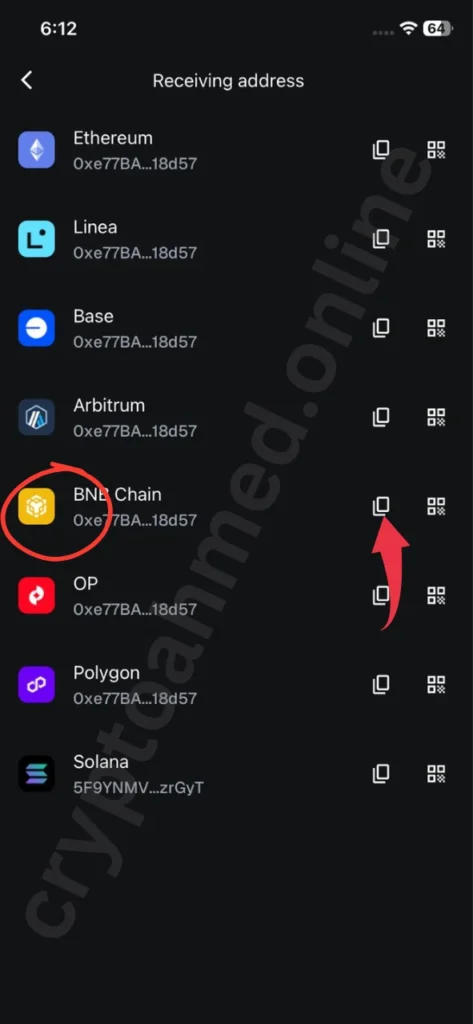
Step 8: Click on BNB Chain
You’ll see several network options on this page. From the list, select BNB Smart Chain (BEP-20) to receive your USDT on the correct network.
Step 9: Confirm Withdraw
Enter all the required details and paste the wallet address you copied from MetaMask. Once everything is correct, confirm the transaction. After a few minutes, you’ll receive a notification on both Binance and MetaMask, confirming that your transfer was successful. You can then check your MetaMask wallet to see the updated balance.
You Might Like This
- Binance DCA Bot Explained: The Easiest Way to Automate Your Crypto Investments
- How to Buy and Set Up Your First Web3 Domain: The Complete Step-by-Step Guide
- How to Secure Your Crypto Funds in Binance Complete Guide
- Binance Auto-Invest Explained: The Easiest Way to Build Wealth in Crypto
FAQ’s
1. Can I send USDT from Binance to MetaMask?
Yes, you can. Just make sure you select the correct network, such as BNB Smart Chain (BEP-20) or Ethereum (ERC-20), depending on which one your MetaMask wallet is set up for.
2. How long does it take to receive USDT in MetaMask?
Transfers usually take a few minutes, but it can take longer if the network is busy. You’ll get a confirmation notification once the transaction is completed.
3. What happens if I choose the wrong network?
If you send USDT using the wrong network, your tokens may not appear in your MetaMask wallet and could be lost. Always double-check that the network on Binance matches the one selected in MetaMask.
4. Is there a fee for sending USDT from Binance to MetaMask?
Yes, Binance charges a small network withdrawal fee, which varies depending on the network you use. For BNB Smart Chain, it’s usually around 0.25 to 0.30 USDT.
5. Can I use MetaMask to store other cryptocurrencies besides USDT?
Absolutely. MetaMask supports a wide range of tokens and networks, including Ethereum, BNB Smart Chain, Polygon, and others. You can easily add and manage multiple tokens within the same wallet.
Conclusion
Transferring USDT from Binance to MetaMask is a simple process once you understand how it works. By following the correct steps and selecting the right network, you can easily move your funds from a centralized exchange to a decentralized wallet where you have full control over your assets. Always double-check your wallet address and network before confirming any transaction to avoid mistakes. With MetaMask, you not only store your USDT securely but also gain access to a wide range of decentralized apps and blockchain features — giving you complete ownership of your crypto.